Excel Set Printable Area
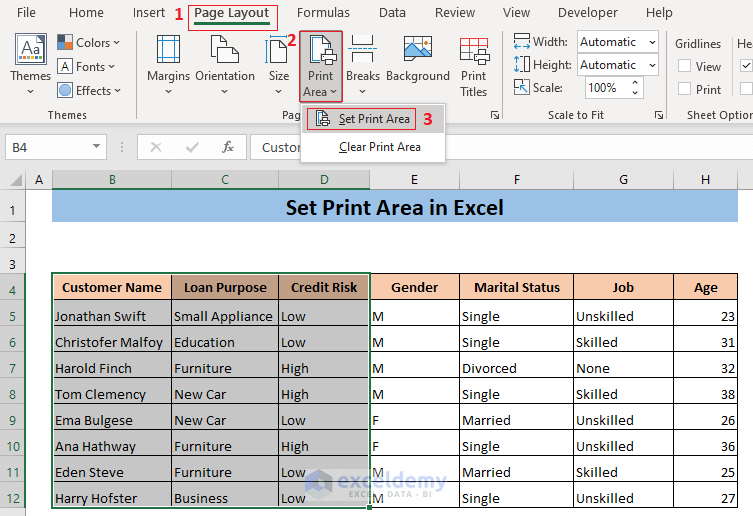
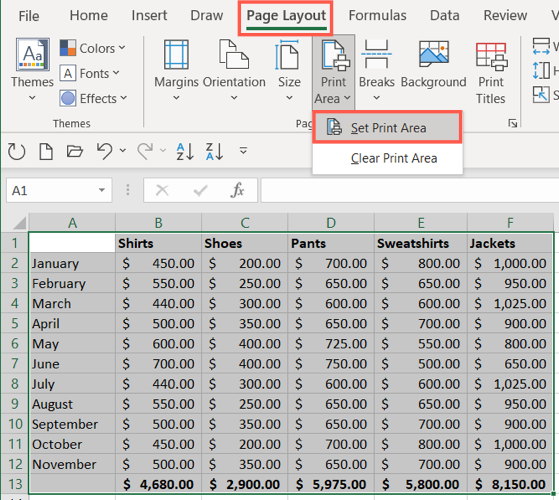
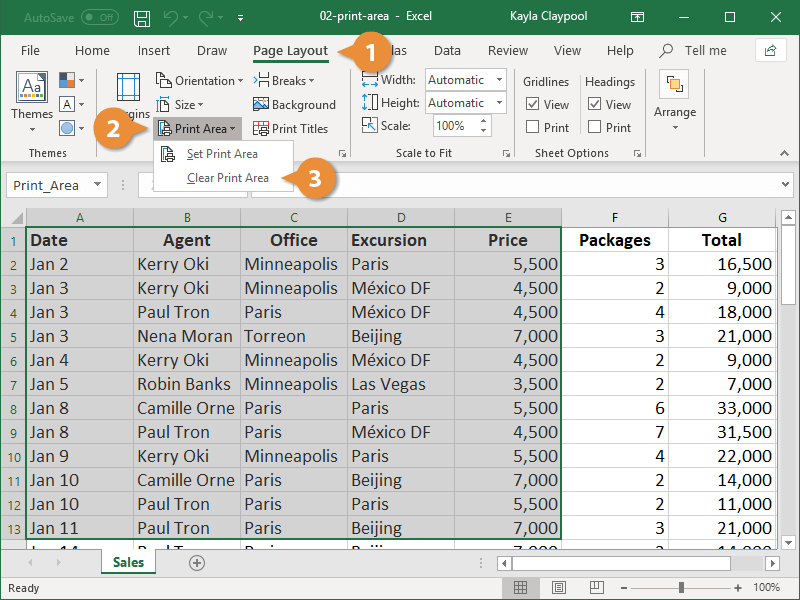
Excel Set Printable Area - Here are the steps to set the print area in excel: If you want to print only certain columns, not all of them, select the specific columns and. If you’re looking for a simple and efficient way to optimize your excel printing process, one effective method is to set the printable area of your worksheet. How to set the print area in excel worksheets. To do this, you need to. Setting the print area in excel for multiple pages can save time and paper by ensuring only the parts of your spreadsheet you need are printed. On the page layout tab, in the page setup group, click print area. A print area is a designated part of your worksheet that you want to print. Select a range of cells. Perhaps depends on layout, but in any case around 2000 pages. Go to the page layout tab and click on the print area button. In short, you have to navigate to “ page layout ” > “ page setup ” > “ print area ” > “ set print area.” in this article, i’ll show you how to set the print area for microsoft excel. One of excel’s useful features is the ability to set a printable area, ensuring that only specific parts of your spreadsheet are printed. If you frequently print a specific section of your worksheet, you can set a print area for it. Set print area in excel using print area command. Select the range of cells that you want to set as the print area in that excel worksheet. If you want to print only certain columns, not all of them, select the specific columns and. Choose the cells we aim to set as the required print area. Select a range of cells. Perhaps depends on layout, but in any case around 2000 pages. The print area button in the page setup block of the page layout tab is the default tool for setting a print area in excel. Select the range of cells that you want to set as the print area in that excel worksheet. Click the print area button. Perhaps depends on layout, but in any case around 2000 pages. If. And if we have to set more than one print area, press ctrl and select the specific sections. Excel allows you to create custom print areas for more specific data you want to print. You will know the print area is set when you. The print area button in the page setup block of the page layout tab is the. One of excel’s useful features is the ability to set a printable area, ensuring that only specific parts of your spreadsheet are printed. If you want to print only certain columns, not all of them, select the specific columns and. The print area button in the page setup block of the page layout tab is the default tool for setting. To set the print area, you select the area and hit the set print area command; To set a print area, execute the following steps. One of excel’s useful features is the ability to set a printable area, ensuring that only specific parts of your spreadsheet are printed. In short, you have to navigate to “ page layout ” >. To set the print area, you select the area and hit the set print area command; If you’re looking for a simple and efficient way to optimize your excel printing process, one effective method is to set the printable area of your worksheet. If you frequently print a specific section of your worksheet, you can set a print area for. Perhaps depends on layout, but in any case around 2000 pages. If you’re looking for a simple and efficient way to optimize your excel printing process, one effective method is to set the printable area of your worksheet. You will know the print area is set when you. Setting the print area in excel for multiple pages can save time. Once a print area is set, add additional print areas by selecting the additional cells, clicking the print area button, and selecting add to print. You will know the print area is set when you. Go to the page layout tab and click on the print area button. If you frequently print a specific section of your worksheet, you can. Choose the cells we aim to set as the required print area. If you want to print only certain columns, not all of them, select the specific columns and. How to set the print area in excel worksheets. If you’re looking for a simple and efficient way to optimize your excel printing process, one effective method is to set the. To set the print area, you select the area and hit the set print area command; Choose set print area to define the area including the comments as your print area. Perhaps depends on layout, but in any case around 2000 pages. If you’re looking for a simple and efficient way to optimize your excel printing process, one effective method. Choose the cells we aim to set as the required print area. In short, you have to navigate to “ page layout ” > “ page setup ” > “ print area ” > “ set print area.” in this article, i’ll show you how to set the print area for microsoft excel. If you frequently print a specific section. Excel allows you to create custom print areas for more specific data you want to print. Setting the print area in excel for multiple pages can save time and paper by ensuring only the parts of your spreadsheet you need are printed. Once a print area is set, add additional print areas by selecting the additional cells, clicking the print area button, and selecting add to print. Choose the cells we aim to set as the required print area. Choose set print area to define the area including the comments as your print area. By setting a print area, you can specify which cells should be included on the printed page, helping you. Go to the page layout tab and click on the print area button. If you frequently print a specific section of your worksheet, you can set a print area for it. On the page layout tab, in the page setup group, click print area. In short, you have to navigate to “ page layout ” > “ page setup ” > “ print area ” > “ set print area.” in this article, i’ll show you how to set the print area for microsoft excel. If in such workbook we. Click the print area button. Set print area in excel using print area command. A print area is a designated part of your worksheet that you want to print. And if we have to set more than one print area, press ctrl and select the specific sections. Select the range of cells that you want to set as the print area in that excel worksheet.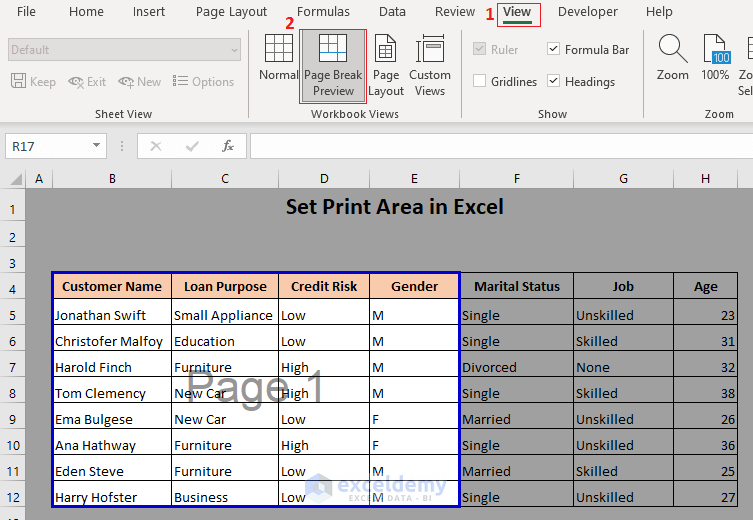
How to Set Print Area in Excel (5 Methods) ExcelDemy
How to Set Print Area in Excel (5 Methods) ExcelDemy
How to Set Print Area in Excel (5 Methods) ExcelDemy
:max_bytes(150000):strip_icc()/ExcelSetPrintArea-5c23d199c9e77c0001adc722.jpg)
How To Set Printable Area In Excel
How to Set the Print Area in Microsoft Excel
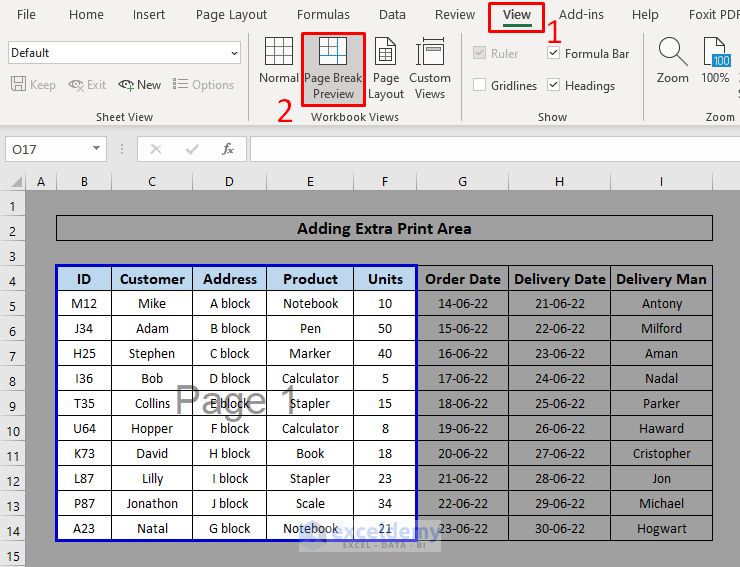
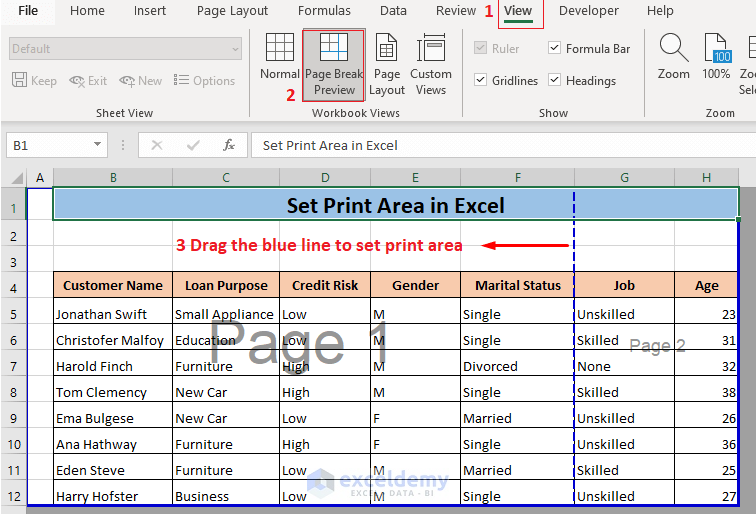
How to Set Print Area with Blue Line in Excel 5 Easy Ways
:max_bytes(150000):strip_icc()/ExcelPageBreakPreview-5c1c28c8c9e77c00017a2ade.jpg)
How to set print area in excel rewacharity
Select Printable Area Excel
How to Set Print Area in Excel CustomGuide
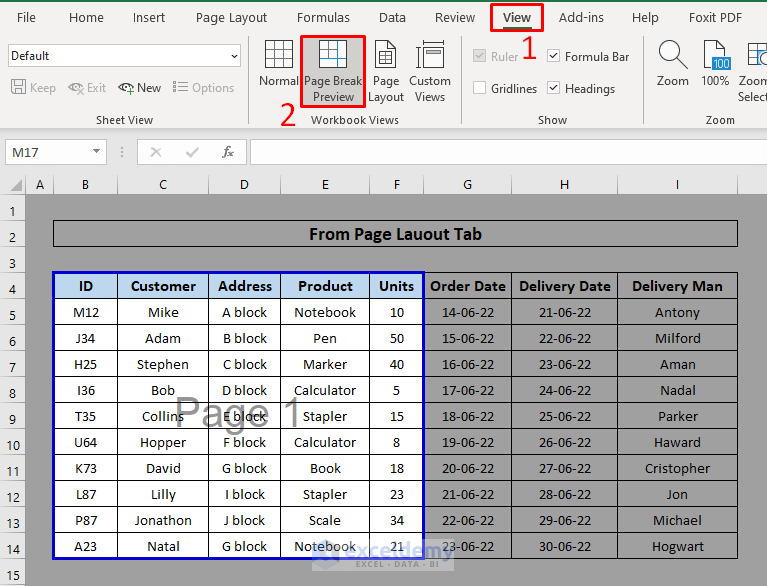
How to Set Print Area with Blue Line in Excel 5 Easy Ways
To Set A Print Area, Execute The Following Steps.
If You Want To Print Only Certain Columns, Not All Of Them, Select The Specific Columns And.
The Print Area Button In The Page Setup Block Of The Page Layout Tab Is The Default Tool For Setting A Print Area In Excel.
Select A Range Of Cells.
Related Post: